Tuesday 30 July 2013

Sony Xperia Z Ultra launched in India for Rs. 46990

gsmarena_003
The Sony Xperia Z Ultra profile measures just 6.5mm, the slimmest 1080p device and close to slimmest overall. We were quite impressed with the Tablet Z and this undercuts it by a fraction. Unlike the Xperia Tablet Z, however, this uses the latest chipset and Android available - Snapdragon 800 and Android 4.2 respectively.

Sony Xperia Z Ultra at a glance

  • General: Quad-band GSM/GPRS/EDGE, penta-band UMTS/HSPA, 100 Mbps LTE
  • Form factor: Ultra-thin water-resistant touchscreen phablet
  • Dimensions: 179.4 x 92.2 x 6.5, 212 g
  • Display: 6.4" 16M-color 1080p (1080 x 1920 pixels) capacitive touchscreen TFT Triluminous display with X-Reality and OptiContrast
  • CPU: Quad-core 2.2 GHz Krait 400
  • GPU: Adreno 330
  • Chipset: Qualcomm Snapdragon 800
  • RAM: 2GB
  • OS: Android 4.2 Jelly Bean
  • Memory: 16GB storage, microSD card slot
  • Camera: 8 megapixel auto-focus camera with face detection; Full HD (1080p) video recording at 30fps with HDR, 2MP front-facing camera with FullHD video capture
  • Connectivity: Wi-Fi a/b/g/n, Wi-Fi hotspot, Bluetooth 4.0, standard microUSB port with MHL and USB host, GPS receiver with A-GPS, 3.5mm audio jack, NFC
  • Misc: IP58 certified - dust-sealed and water resistant beyond 1 meter; Shatter proof and scratch-resistant glass for the front and the back panel, metal frame on the sides
This is a no-mercy pre-emptive strike against the Samsung Galaxy Note III and all other high-end phablets that might crop up. So far we've only heard that this or that device will use a Snapdragon 800 chipset, but this one is the first to really go for it. And the attractive design and thin body are bound to win many proponents - they did for the Xperia Z and Tablet Z.
Same goes for the water resistant certification - IP58 means it can go deeper than 1m of water, unlike the sissy Xperia Z and Samsung Galaxy S4 Active.
The screen has 1080p resolution and despite the big increase in diagonal it still has 344ppi pixel density, enough to qualify it for a Retina display label. It's a Triluminos display with OptiContrast and X-Reality, too, to prove that Sony is throwing the kitchen sink at this one. If it's as good as the one on the Xperia Tablet Z, we'd be stocked (no offence to the Xperia Z phone, but we like good viewing angles).
The slim body did come at a price though, the battery has only 3,000mAh capacity. That's not a lot to go around for a quad-core processor clocked at the insane 2.2GHz (which might be very power-efficient, we don't know yet) and a 6.4" 1080p display.
So, is the Sony Xperia Z Ultra the future - big, high-powered, thin and beautiful - or is it just the king of the phablet niche? Well, that niche has been expanding as of late and so have our pockets.
The Sony Xperia Z Ultra is priced at an MRP of Rs. 46990. The Sony Xperia Z Ultra is available for preorder on Flipkart.

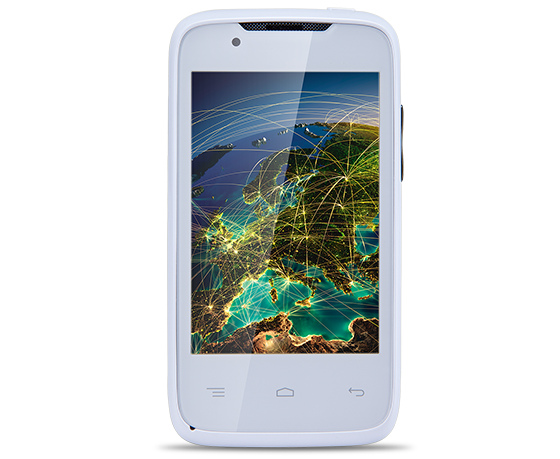
Lava Iris 356 and Iris 402 with dual-core processor, Android 4.2 coming soon for Rs. 4499 and Rs. 5499


Lava Iris 356
Lava is all set to release two new budget smartphones in the Iris range, the Iris 356 and the Iris 402. Both these smartphones are listed on the official website and packs decent specs for the price. The Iris 356 has a 3.5-inch (480 x 320 pixels) display and the the Iris 402 packs a 4-inch (480 x 800 pixels) display. Both these devices are powered by a 1.2 GHz dual-core processor and runs on Android 4.2 (Jelly Bean). These have 3G support, Dual SIM with dual stadby, rear and front-facing camera.
Lava Iris 356 specifications
  • 3.5-inch (480 x 320 pixels) capacitive touch screen display
  • 1.2 GHz dual-core processor
  • Dual SIM (GSM + WCDMA) with Dual Standby
  • Android 4.2 (Jelly Bean) OS
  • 1.3MP Fixed Focus rear camera
  • 0.3MP (VGA) front-facing camera
  • 3.5mm audio jack, FM Radio with recording
  • 3G, Bluetooth with A2DP, Wi-Fi, GPS
  • 12.6mm thick and weighs 112g
  • 256 MB RAM, 512 Internal memory (100 MB user memory), Expandable memory up to 32GB with micro SD
  • 1500 mAh  battery with up to 5 hours talk time and up to 200 hours standby
Lava Iris 402
Lava Iris 402 specifications
  • 4-inch (480 x 800 pixels) capacitive touch screen display
  • 1.2 GHz dual-core processor
  • Dual SIM (GSM + WCDMA) with Dual Standby
  • Android 4.2 (Jelly Bean) OS
  • 3MP rear Fixed Focus camera
  • 0.3MP (VGA) front-facing camera
  • 3.5mm audio jack, FM Radio with recording
  • 11.4mm thick and weighs 124g
  • 3G, Bluetooth with A2DP, Wi-Fi, GPS
  • 256 MB RAM, 512 Internal memory (100 MB user memory), Expandable memory up to 32GB with micro SD
  • 1500 mAh  battery with up to 4 hours talk time and up to 200 hours standby
The Lava Iris 356 Crystal White, Black and Grey and is priced at Rs. 4,449, while the Iris 402 would be available in Crystal White, Grey and Red colors and is priced at Rs. 5,499. Both are expected to be launched soon.

Saturday 27 July 2013

How To Root or Unroot Xolo Q700

Xolo Q700 is a dual-SIM phone packed with Android v4.2 (Jelly Bean) OS, quad core 1.2GHz processor, and 1GB RAM. The phone has 5MP back camera with LED flash & VGA front camera. For connectivity, it has Bluetooth, Wi-Fi, 3G, and USB. Its 2400 mAh battery gives 33 hrs music playback, 10 hrs video playback, 17 hrs 2G talk time, 16 hrs 3G talk time, 16 days 2G standby time, and 15 days 3G standby time. Other features include GTalk, dedicated Kids Mode with parental controls, and 4GB internal storage.Q700 is very popular in Indian Smartphone market.
Xolo-Q700
Today we will show you how to root or unroot Xolo Q700 : By EditAndroid

1. Before You Begin:

  1. This method is tested on Xolo Q700 only (Please don’t try on other devices)
  2. You need a Windows based PC or Laptop.
  3. Enable USB Debugging in your device.Follow this method if you don’t know how to enable.
  4. Download & Install Xolo Q700 USB Drivers in your PC.
  5. You device must charged 50% minimum.

2. Download Required Files:

  1. Auto Root Tool

3. Rooting/Unrooting Of Xolo Q700:

  1. Please follow all the instructions given above for safe rooting.
  2. After Installing USB Drivers connect your device with PC and let him complete his driver installation.
  3. Download & Extract the Auto Root Tool zip file in a folder of your PC.
  4. After extracting you see a RunMe.bat file in folder.
  5. Now double click on RunMe.bat and launch it.
  6. A CMD Window open in your PC with some options.
  7. You will see “Please Enter A Valid Number (1 to x)”.
  8. Type 1 and press enter for start rooting,Your device reboot during the process.
  9. Your device automatically restart and you will find a SuperSu app in App Drawer.
  10. Congrats!!! you are successful in rooting.
  11. If you want to unroot your device follow the method same as for rooting,But when you click on RunMe.bat and some options appear on CMD window Type x for unroot and hit enter.
So this is the method of Rooting & Unrooting of Xolo Q700….If you face any problem feel free to contact me by comment below or On our FB Page

How To Root or Unroot Xolo Q600

Xolo Q600 with 1.2 GHz Quad Core CPU PowerVR SGX processor with awesome features. This new model have 512 MB of RAM for nice speed and 1.2 Quad Core Processor technology allows multiple programs to run simultaneously on the processor so Run multiple apps without slowing down. Power VR SGX544 Graphics Processor for batter 2D and 3D view. q600 is with 4GB internal memory and the Jelly Bean v4.2 Operating System and 4.5 inches display with TFT 5 finger touch display. Finally this model is very high performance mobile and provide a high speed browsing on internet. For the security matter this phone is on good position because of its in-built XOLO Secure | Anti -theft app. One more special in built application feature for the speed typing Type Fast | Swype Faster app.
XOLO-Q600-smartphone-will-be-priced-at-Rs-8999


Today we will show you how to root or unroot Xolo Q600 : By EditAndroid

1. Before You Begin:

  1. This method is tested on Xolo Q600 only (Please don’t try on other devices)
  2. You need a Windows based PC or Laptop.
  3. Enable USB Debugging in your device.Follow this method if you don’t know how to enable.
  4. Download & Install Xolo Q600 USB Drivers in your PC.
  5. You device must charged 50% minimum.

2. Download Required Files:

  1. Auto Root Tool

3. Rooting/Unrooting Of Xolo Q600:

  1. Please follow all the instructions given above for safe rooting.
  2. After Installing USB Drivers connect your device with PC and let him complete his driver installation.
  3. Download & Extract the Auto Root Tool zip file in a folder of your PC.
  4. After extracting you see a RunMe.bat file in folder.
  5. Now double click on RunMe.bat and launch it.
  6. A CMD Window open in your PC with some options.
  7. You will see “Please Enter A Valid Number (1 to x)”.
  8. Type 1 and press enter for start rooting,Your device reboot during the process.
  9. Your device automatically restart and you will find a SuperSu app in App Drawer.
  10. Congrats!!! you are successful in rooting.
  11. If you want to unroot your device follow the method same as for rooting,But when you click on RunMe.bat and some options appear on CMD window Type x for unroot and hit enter.
So this is the method of Rooting & Unrooting of Xolo Q600….If you face any problem feel free to contact me by comment below or On our FB Page

How To Root & Unroot Celkon A119Q Signature HD

Celkon's Signature HD A119Q unveils the best smartphone features ever. Live the moment with the vibrant 5" HD screen. Powered by a 2100mAh battery and the latest Android OS, A119Q's 1.2 GHz Quad Core processor gives you the ultimate gaming experience. The smartphone's Quad Core processor helps you to multi-task easily without compromising on clarity. Flaunt the sleek design and discover every detail with the 720*1280 Pixels screen resolution. It's time to say goodbye to boring multimedia features. Capturing great photos is just a click away. The incredible 12 MP camera with auto-focus and smart LED flashlight helps you treasure every expression. The 3 MP front camera is definitely the icing on the cake. The more the better! Contacts, E-mails, messages, music files, pictures, videos, name it and you have it with you all along. The A119Q will always have the space to store your important and valuable stuff with its 4GB internal and 32GB expandable memory.
Celkon-A119Q-Signature-HD
Today we will show you how to root or unroot Celkon A119Q Singnature HD : By EditAndroid

1. Before You Begin:

  1. This method is tested on Celkon A119Q only (Please don’t try on other devices)
  2. You need a Windows based PC or Laptop.
  3. Enable USB Debugging in your device.Follow this method if you don’t know how to enable.
  4. Download & Install Celkon A119Q USB Drivers in your PC.
  5. You device must charged 50% minimum.

2. Download Required Files:

  1. Auto Root Tool

3. Rooting/Unrooting Of Celkon A119Q:

  1. Please follow all the instructions given above for safe rooting.
  2. After Installing USB Drivers connect your device with PC and let him complete his driver installation.
  3. Download & Extract the Auto Root Tool zip file in a folder of your PC.
  4. After extracting you see a RunMe.bat file in folder.
  5. Now double click on RunMe.bat and launch it.
  6. A CMD Window open in your PC with some options.
  7. You will see “Please Enter A Valid Number (1 to x)”.
  8. Type 1 and press enter for start rooting,Your device reboot during the process.
  9. Your device automatically restart and you will find a SuperSu app in App Drawer.
  10. Congrats!!! you are successful in rooting.
  11. If you want to unroot your device follow the method same as for rooting,But when you click on RunMe.bat and some options appear on CMD window Type x for unroot and hit enter.
So this is the method of Rooting & Unrooting of Celkon A119Q….If you face any problem feel free to contact me by comment below or On our FB Page

How to Root and Unroot XOLO Q1000 Smartphone

Xolo Smartphones are popular in India because of its superb design with great specs and low price.Xolo Q1000 is new smartphone from Xolo with some great features in budget.Xolo Q1000 comes with a 1.2 GHz quadcore processor same you find in Micromax Canvas 4.Xolo Q1000 is loaded with Android 4.2 jellybean with 1Gb of Ram with 5inch HD Display.
Xolo-Q10002
So, Today I will show you How To Root or Unroot Xolo Q1000

1. Before You Begin:

  1. This method is tested on Xolo Q1000 only (Please don’t try on other devices)
  2. You need a Windows based PC or Laptop.
  3. Enable USB Debugging in your device.Follow this method if you don’t know how to enable.
  4. Download & Install Xolo Q1000 USB Drivers in your PC.
  5. You device must charged 50% minimum.

2. Download Required Files:

  1. Auto Root Tool

3. Rooting/Unrooting Of Micromax Canvas 4 A210:

  1. Please follow all the instructions given above for safe rooting.
  2. After Installing USB Drivers connect your device with PC and let him complete his driver installation.
  3. Download & Extract the Auto Root Tool zip file in a folder of your PC.
  4. After extracting you see a RunMe.bat file in folder.
  5. Now double click on RunMe.bat and launch it.
  6. A CMD Window open in your PC with some options.
  7. You will see “Please Enter A Valid Number (1 to x)”.
  8. Type 1 and press enter for start rooting,Your device reboot during the process.
  9. Your device automatically restart and you will find a SuperSu app in App Drawer.
  10. Congrats!!! you are successful in rooting.
  11. If you want to unroot your device follow the method same as for rooting,But when you click on RunMe.bat and some options appear on CMD window Type x for unroot and hit enter.
So this is the method of Rooting & Unrooting of Xolo Q1000….If you face any problem feel free to contact me by comment below or On our FB Page

How To Root and Unroot Micromax Canvas 4 A210

Sporting a Smooth and Simple design, Micromax Canvas 4 promises to blow your mind with the looks. Claiming to be the best Smartphone ever launched by Micromax, Canvas 4 carries some unique features. The list of the unique features starts with the “Blow Air Or Shake to unlock” the screen feature. The handset comes with corning glass and curve touch panel. This ensures Minimal Contact Damage, Attractive appearance, Anti scratch display and Curve TP helps provides better holding.
Micromax Canvas 4 sports a 5-inch 16:9 HD IPS LCD display that makes it a perfect phablet. Other display features include High Definition, high brightness & high contrast, Free view angle, no color shift, no gray inversion, Fast response time, clear movie image and Vivid color presentation. The high sensitive touch panel ensures better sensitivity, smooth operating experience, responses to wet/sweaty fingers as well and can operate with gloves.
Powered by a superfast 1.2GHz Quad Core processor, Micromax Canvas 4 with cortex A7 quad core chipset will be the best option for customers who indulge in multitasking. With blazing download speed of 42Mbps, Canvas 4 is sure one of the fastest phablets available in the market right now.
canvas_4_1
Micromax Canvas 4 come with very good features but in terms of hardware Canvas 4 is like his Old brother Canvas HD.
So,People like Canvas 4 with the features in it.But some people like me :D want more from a smartphone.But before getting something more we have to do some work...
So ,Today I will show you how to root Micromax Canvas 4 A210: By EditAndroid.Com

1. Before You Begin:

  1. This method is tested on Micromax Canvas 4 only (Please don't try on other devices)
  2. You need a Windows based PC or Laptop.
  3. Enable USB Debugging in your device.Follow this method if you don't know how to enable.
  4. Download & Install Micromax Canvas 4 A210 USB Drivers in your PC.
  5. You device must charged 50% minimum.

2. Download Required Files:

  1. Auto Root Tool

3. Rooting/Unrooting Of Micromax Canvas 4 A210:

  1. Please follow all the instructions given above for safe rooting.
  2. After Installing USB Drivers connect your device with PC and let him complete his driver installation.
  3. Download & Extract the Auto Root Tool zip file in a folder of your PC.
  4. After extracting you see a RunMe.bat file in folder.
  5. Now double click on RunMe.bat and launch it.
  6. A CMD Window open in your PC with some options.
  7. You will see "Please Enter A Valid Number (1 to x)".
  8. Type 1 and press enter for start rooting,Your device reboot during the process.
  9. Your device automatically restart and you will find a SuperSu app in App Drawer.
  10. Congrats!!! you are successful in rooting.
  11. If you want to unroot your device follow the method same as for rooting,But when you click on RunMe.bat and some options appear on CMD window Type x for unroot and hit enter.
So this is the method of Rooting & Unrooting of Micromax Canvas 4 A210....If you face any problem feel free to contact me by comment below or On our FB Page

How To Overclock Sony Xperia Z

Leaving no stone unturned, the Xperia Z gives you everything you need to make work and play absolutely amazing. To start with, the phone is powered by the powerful 1.5 GHz Qualcomm Snapdragon S4 Pro with 2 GB RAM. To enhance your user-experience on the Sony Xperia Z is the 5 inch TFT capacitive, full HD touchscreen.
Two things you have to love about this screen are the Touch Gesture feature that makes the screen exceptionally responsive making all those slides and scrolls smooth as ever and secondly you have to love the brilliance of theBRAVIA Engine 2 that gives you increased image quality, sharpness, contrast and saturation for an enjoyable viewing experience. To top it off, the Xperia Z employs the Android v4.1 (Jelly Bean) OS to give you all you need from this phone.
To further impress is the 13 MP primary camera with 16x digital zoom and an LED flash. The phone has a 2 MP secondary camera and full HD video recording. With 3D Surround Sound, you enjoy mind-blowing clarity on the music and video players as well as the FM radio.
xperia-z-gallery-03-1240x840-7ecd093f3b661a91374d8ea94bfa2806
But Today we will show you how to make your device more Faster,Smoother by Overclocking you Sony Xperia Z.
1. Before Your Begin:
  1. Your Device must be Rooted and Custom Recovery & Unlocked Bootloader (If your device if not rooted and unlocked & custom recovery please follow this guide).
2. Download Required Files:
  1. DoomKernel (Donate DoomLord for his great work)
3. Overclocking Of Sony Xperia Z:
  1. Plug in your device via USB.
  2. Copy the kernel .zip file to the internal storage of your device.
  3. Unplug the device.
  4. Open XZRecovery (should be installed by the end of out how to root procedure) and click Reboot Recovery.
  5. Once in recovery mode, tap Backup, swipe to backup, and then wait for it to backup.
  6. Hit back.
  7. Tap Install and scroll down to find the kernel .zip file and install it.
  8. Once it’s flashed, hit back.
  9. Hit Reboot > System.
  10. Go to the Play Store.
  11. Search for and install No-frills CPU Control.
  12. Open No-frills CPU Control.
  13. Make sure Set on Boot is OFF.
  14. Tap on the Max Clock Frequency dropdown and select the next highest frequency (do NOT jump to the highest frequency), then hit Apply, and then use the phone for a bit normally.
  15. If there are no issues, then go back to the app and try the next highest frequency, then hit Apply, and then use the phone for a bit normally.
  16. Repeat until you get to the highest frequency the device will allow (if it crashes or reboots then you know to use the frequency just below that one that it didn’t crash on).
  17. Once you’ve settled on a new max frequency, you can check Set on Boot to have it automatically apply the new max frequency every time the phone starts (you wouldn’t want to set this before you know which frequency is good for you because otherwise if it crashed from a frequency it would just constantly crash since that frequency would be set every time the phone turned on).

How To Update Android 4.3 on Google Nexus 7

Nexus 7 is built by ASUS and comes with a NVIDIA® Tegra® 3 quad-core processor so everything is faster - pages load quickly, gameplay is smooth and responsive, and running multiple apps is a breeze. Patented 4-PLUS-1™ design gives you processing power when you need it, and battery saving efficiency when you don't. Nexus 7 was designed with gaming in mind. With heart pounding quad-core performance, a vibrant 1280-by-800 high-resolution display, and sensors like a gyroscope and accelerometer - do a barrel roll then tilt, touch and tap your way to the top of the leaderboards while exploring over 700,000 apps and games on Google Play. This multi award-winning game has been heavily optimized to utilize the eight core rendering power of Tegra's GeForce GPU, so it looks and plays great on Nexus 7. With over 8 hours of HD video playback, 10 hours of web browsing or e-reading, and up to 300 hours of standby time, Nexus 7 can go the distance.
google-nexus-7-xl2
And now Google Nexus 7 also get Android 4.3 jellybean update.
Follow the guide for updating your Nexus 7 to Android 4.3:BY EditAndroid.Com
1. Before You Begin:
  1. This method is only for Nexus 7 with Android 4.2.2 jellybean (Please don't try to any other device or android version).
  2. You need a Windows based PC or Laptop.
  3. Enable USB Debugging of your device.How to Enable??? Click Here
  4. Download & Install Nexus 7 USB Drivers in your PC .After installing connect your device to PC with USB for complete the installation.
  5. Your device must be charged 50% minimum for this method.
  6. Create a Backup of your device data for safety.
2. Download Required files:
  1. Android 4.3 for Nexus 7 (ab67ca07c4b2e03eca795ada10ff041b77fbb7bf.signed-nakasi-JWR66V-from-JDQ39.ab67ca07.zip)
3. Updating of Google Nexus 7:
  1. Download the Official Android 4.3 update file from above & Renamed it to update.zip
  2. Now connect you device to PC via USB Cable and select Data Transfer Mode in your Nexus 7.
  3. Now Copy & Paste the update.zip file in the root of your SD card.
  4. Now Disconnect your device and power off your device.
  5. Now Boot your device in Bootloader Mode (By Pressing & hold Volume Up+Volume Down+Power Key).
  6. Press Volume Up button several times untill  Recovery appears on you device screen,Now press Power Button.
  7. When Exclamation mark appear in your device screen,Hold Volume Up and Power Button together for Recovery Mode.
  8. Now you are in Recovery Mode,Select update from sdcard and browse and select the update.zip file.
  9. Wait until installation complete,the installation process can take few minutes to complete.
  10. After the Installation complete,Reboot your device.
  11. Please note that first boot of your device can take 5 minute (Because it will install Apps & Services in first boot).
Congrats!!! Your are successful in updating your device
If you find and problem.....Contact Us by comment below

Ubuntu Edge Specs and Features

What is Ubuntu Edge?

In the car industry, Formula 1 provides a commercial testbed for cutting-edge technologies. The Ubuntu Edge project aims to do the same for the mobile phone industry — to provide a low-volume, high-technology platform, crowdfunded by enthusiasts and mobile computing professionals. A pioneering project that accelerates the adoption of new technologies and drives them down into the mainstream.
edge-1

This beautifully crafted smartphone is a proving ground for the most advanced mobile technologies on the horizon, a showpiece for true mobile innovation. And at the heart of it all is convergence: connect to any monitor and this Ubuntu phone transforms into an Ubuntu PC, with a fully integrated desktop OS and shared access to all files.
edge-4-large

We’re fascinated by converged computing, the idea that the smartphone in your pocket can also be the brain of the PC on your desk. We’ve shaped Ubuntu so you can transition seamlessly between the two environments. Now all that’s needed is a phone that’s designed from the ground up to be a PC as well.
The Ubuntu Edge is our very own superphone, a catalyst to drive the next generation of personal computing.

 About The Hardware?

We’ve scoured the research labs of the biggest companies and most exciting startups for the latest and greatest mobile technologies to specify the first-generation Edge.
Crafted from cool, textured amorphous metal, the Edge has a distinctive, precise look but its rakishly chamfered edges are shaped to fit naturally in the palm — our design prototype already has a wonderfully solid feel. It’s the right size, too. Edge gestures are the next big thing in mobile, and our testing has found that a 4.5in screen is ideal for comfortable control of all four edges with one hand.
edge-2-large
We also believe the race for ever higher resolution has become a distraction. Beyond 300ppi you’re adding overhead rather than improving display clarity. We think colour, brightness and dynamic range are now the edge of invention so we’ll choose a display for its balance of resolution, dynamic range and colour accuracy.
We’ll protect that gorgeous display with something vastly tougher than glass: pure sapphire crystal, a material so hard only diamond could scratch it. For a phone to run a full desktop OS, it must have the raw power of a PC. We’ll choose the fastest available multi-core processor, at least 4GB of RAM and a massive 128GB of storage. The battery will use silicon-anode technology, so we can squeeze more energy into the same dimensions.

With that kind of muscle, this phone can be your main PC anywhere — and we really do mean anywhere. You can use the desktop wherever you can find a standard HDMI screen, and the dual-LTE chip will get you online with 4G even when you’re travelling abroad. It’s desktop computing gone truly mobile.

About Software?

Next-generation hardware deserves innovative software. The Ubuntu Edge will dual-boot both the Ubuntu phone OS and Android, and convert into a fully integrated Ubuntu desktop PC.
ui-3

First, Ubuntu mobile. We designed the interface to create a beautiful home screen that’s free from the usual clutter. You navigate by swiping over an edge of the screen: open your favourite apps on the left edge, switch instantly between open apps from the right, and use the system and app toolbars at the top and bottom respectively. It’s so simple, Ubuntu doesn’t need a home button at all.
Specialist data artists have designed Ubuntu’s welcome screen, with graphics that evolve over time to reflect your use of the phone. We’ve reinvented the inbox so you can read and respond to texts, emails and social media posts in an instant.
ui-4

From mobile… to desktop. Yes, it’s the full Ubuntu desktop OS used by millions on a daily basis — and it runs directly from the phone, so you’ll be able to move seamlessly from one environment to the other with no file syncing or transfers required. The core OS and applications are fully integrated with their smartphone equivalents, so you can even make and receive calls from the desktop while you work.
Finally, you can also boot the phone into Android. And there’s a good reason for that…

Technical Specifications?

  • Dual boot Ubuntu mobile OS and Android
  • Fully integrated Ubuntu desktop PC when docked
  • Fastest multi-core CPU, 4GB RAM, 128GB storage
  • Micro-SIM
  • 4.5in 1,280 x 720 HD sapphire crystal display
  • 8mp low-light rear camera, 2mp front camera
  • Dual-LTE, dual-band 802.11n Wi-Fi, Bluetooth 4, NFC
  • GPS, accelerometer, gyro, proximity sensor, compass, barometer
  • Stereo speakers with HD audio, dual-mic recording, Active Noise Cancellation
  • 11-pin connector providing simultaneous MHL and USB OTG
  • 3.5mm jack
  • Silicon-anode Li-Ion battery
  • 64 x 9 x 124mm
concepts-1


Well I think you like this device and want to Buy it
But unfortunately Ubuntu Edge will be available in limited stock.
So you can get one for your self from Here

Friday 26 July 2013

New Nexus 7 announced with Full HD display, Snapdragon S4 Pro CPU and Wireless Charging starting from $229

Nexus7-2013-display
Google announced the new Nexus 7 today at an event in San Francisco where the updated Nexus 7 tablet was one of the main highlights of the event. We have seen plenty of leaks of this device including an unboxing so not much was left for the official announcement except for the confirmation of the specs , the pricing and launch date.  The biggest difference on this Nexus tablet is the update Full HD screen which makes it the highest resolution screen on a 7 inch tablet and also crushes the competition especially the iPad mini. It is the first tablet to run Android 4.3 out of the box which we have covered separately. The new Nexus 7 is marginally thinner than the first gen Nexus 7 and lighter too. It is slightly narrower than the previous model. Another big change is the move from Nvidia Tegra 3 to a Qualcomm Snapdragon processor in terms of the internals. And yes it is still made by Asus.
The device is powered by a Qualcomm Snapdragon S4 Pro quad-core processor running at 1.5GHz along with a Adreno 320 GPU. The RAM has been upped to 2GB from the previous 1GB. There is now a 5MP Camera on the back and a front facing camera too.Audio has been improved with stereo speakers. The tablet comes in two memory capacities 16GB and 32GB and there is no microSD card slot. The battery is a sealed 3950 mAh unit which promises about 9-10 hours of usage. Good to note that Wireless Charging has been added and this might be one of the first tablets to support it.
2013-Nexus-7-Front

Features and Specifications

Screen
7.02” 1920×1200 HD display (323 ppi), 1080p HD IPS, Scratch resistant Corning® Glass
Size114 x 200 x 8.65mm
Weight0.64lbs (290g) Wi-Fi, 0.66lbs (299g) LTE
Cameras5MP rear facing, auto focus
1.2MP front facing, fixed focus
AudioStereo speakers,
Surround sound powered by Fraunhofer
Memory16GB or 32GB internal storage
(formatted capacity will be less)
CPUQualcomm Snapdragon™ S4 Pro quad-core processor, 1.5GHz
GPUAdreno 320, 400 MHz
RAM2GB
WirelessDual-band Wi-Fi (2.4G/5G) 802.11 a/b/g/n, NFC (Android Beam), Bluetooth 4.0
Network (+ Mobile Sku)North America:
4G LTE: 700/750/850/1700/1900/2100 MHZ (Bands: 1/2/4/5/13/17)
HSPA+: 850/900/1900/2100/AWS(1700/2100) MHz (Bands: 1/2/4/5/8)
GSM: 850/900/1800/1900 MHz
Europe:
4G LTE: 800/850/1700/1800/1900/2100/2600 MHz (Bands: 1/2/3/4/5/7/20)
HSPA+: 850/900/1900/2100/AWS(1700/2100) MHz (Bands: 1/2/4/5/8)
GSM: 850/900/1800/1900 MHz
Power3950 mAh (Up to 9 hours of active use)
9 hrs of HD video playback
10 hrs of web browsing or e-reading
300 hrs of standby
SensorsGPS, Gyroscope, Accelerometer, Compass, Ambient Light
Ports and ConnectorsMicroUSB , SlimPort™, 3.5mm audio
Microphone, Power and Volume buttons
OSAndroid Jelly Bean, 4.3

Price and Availability

nexus7-2013-back-508x1024
The Nexus 7 will be available in the US starting from July 30th on Google Play store and several offline stores such as Best Buy , Staples. and even on Amazon.The new Nexus 7 is priced at $229 for the 16GB Wi-Fi model, $269 for the 32GB Wi-Fi model and $349 for 4G LTE model with 32GB of storage. Initially only the WiFi 16GB and 32GB versions will go on sale followed by the LTE version at a later date.
No sign of the this tablet coming to India any time soon but it would be launching in UK, Canada, Germany, Spain, France, Japan, Korea, and Australia in the next few weeks and other countries to follow soon after. Hopefully India is on that list.

Asus Fonepad with 1.6 GHz Intel Atom Z2460 processor, 32GB internal storage now available in India for Rs. 17999

asus_fonepad_video_promo_screen
Asus launched the Fonepad in India with 3G data support and voice calling capabilities back in April. Later the Fonepad was upgraded with a more powerful processor and 32GB internal storage in May. Now the new Fonepad is available from online retailer Flipkart. Apart from the processor and the internal memory, the new Fonepad has similar features including a 7-inch (1280 x 800 pixels) IPS display, 3-megapixel auto focus rear camera with 720p HD video recording, 1.2-megapixel front-facing camera and runs on Android 4.1 (Jelly Bean). 
The Intel Atom Z2420 was used in the Xolo X500, and the Intel Atom Z2460 chip is used in range of devices including Xolo X900, X910 and ZTE Grand X IN.
New Asus Fonepad Specifications
  • 7-inch (1280 x 800 pixels) capacitive touch screen IPS display
  • 1.6 GHz Intel Atom Z2460 processor with PowerVR SGX540 GPU
  • Android 4.1 (Jelly Bean) OS
  • 3MP auto focus rear camera with 720p HD video recording
  • 1.2MP front-facing camera
  • 1GB RAM, 32 GB internal memory, expandable memory up to 32GB with microSD
  • 3G HSPA with voice calling, WiFi 802.11 b/g/n, Blueooth 3.0, GPS
  • 10.4mm thick and weighs 340 grams
  • 4270 mAh battery
The upgraded Asus Fonepad is priced at Rs. 17,999 and comes in Champagne Gold color. It is expected to be officially launched in India later this week.

Wednesday 24 July 2013

How To Root Samsung Galaxy Trend 2 I739 on Android 4.1.2 Jellybean

Samsung-Galaxy-Trend-2-Duos-China
Samsung is a popular South Korean multi-national company. It is well known for its electronic products. Samsung is one of the most trusted companies in India. Samsung has a very good reputation not only in Indian market but throughout the world. Samsung has launched many smartphones in market. Samsung is now counted as one of the fastest growing technology companies in world. It is mainly popular for its Galaxy series which is popular throughout the world. Now, Samsung has decided to launch the latest Samsung Galaxy Trend 2 I739 smartphone in market. 
Many people want to buy this device and many people want to gain root access in this device
So,Here is the full tutorial about how to root Samsung Galaxy Trand 2 I739 running on Android 4.1.2 Jellybean

1. Before Your Begin:

  1. This method is tested on Samsung Galaxy Trand 2 I739 only (Please don't try on other devices or Contact us for tutorials for you device)
  2. You Need a Windows based PC or Laptop for this procedure.
  3. Enable USB Debugging in your device (Don't Know How To??? Follow this)
  4. Download & Install Samsung Galaxy Trend 2 USB Drivers and then connect you device with PC for complete the installation.
  5. Your device must be charged 50% minimum,If not please charge your device first.
  6. Make a Backup of your device data for safety.

2. Download Required Files:

  1. Odin v3.07 zip file : Here (In the last of Post)
  2. Samsung Galaxy Trand 2 Root Zip : Here

3. Rooting Of Samsung Galaxy Trend 2 on Android 4.1.2 Jellybean:

  1. Download & Extract Odin 3.07 in a folder of your Windows based PC or Laptop.
  2. Now Download & Extract Samsung Galaxy Trend 2 Root zip file in a folder of your PC.
  3. Now Switch Off your device.
  4. Enter into Download Mode (By Pressing & Hold Volume Down+Home Button+Power Key)
  5. You should see a warning message,Press Volume UP to continue.
  6. Now Connect you device to PC with USB cable and let him to install some drivers.
  7. Now launch the Odin 3.07 .exe file from the folder where Odin is extracted.
  8. Wait untill Odin show an Added message in the lower left of message box
  9. After your device is detected by Odin,Click on PDA button and select the extracted 27328200.tar.md5 file from Root zip file
  10. Make sure that Auto Reboot is checked & Repartition and F. Reset is not checked.
  11. Now click on Start button and it will start flashing
  12. After the flashing is completed you will see a green PASS message
  13. Now you device shall reboot automatically
  14. When your device start you see a yellow triangle,Don't worry
  15. Connect you device with PC again
  16. Copy the SuperUser,apk into internal storage of your device from the Root zip folder
  17. Navigate the file and install it
  18. Power Off your device again and Boot into Download Mode again
  19. In Odin click on PDA button and select boot.tar.md5 file from Root zip folder
  20. Make sure that Auto Reboot is checked & Repartition and F. Reset is not checked.
  21. Now click on Start button and it will start flashing
  22. After the flashing is completed you will see a green PASS message
  23. Now you device shall reboot automatically
Congrats!!! your Samsung Galaxy Trend 2 is successfully rooted now