Friday, 31 May 2013

How to Install ClockworkMod Touch Recovery on HTC Desire


CWM-Touch-Recovery-HTC-Desire
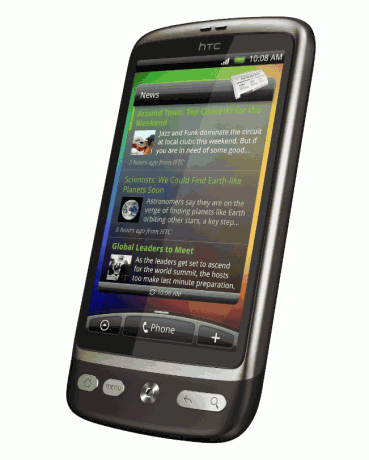
If you don’t like the default ClockworkMod Recovery in which you need to select options using the hardware buttons, then here’s a good news for you. ClockworkMod Touch Recovery is now available for the HTC Desire smartphone and if you are one of the users of this phone, then follow the procedure given below to install the Touch based CWM Recovery on your HTC Desire smartphone.

I. Before You Begin:

1. You must have rooted your HTC Desire smartphone before doing this procedure. Please head to our how to root HTC Desire procedure first, finish it, then return to this procedure and continue.
2. Make sure your phone has at least 60% of battery life left, so you can go through the process without any problems.

II. Downloading Required Files:

1. Download the ClockworkMod Touch Recovery Image from here.
2. Download the Fastboot Package from here.

III. Installing ClockworkMod Touch Recovery on HTC Desire:

1. Place the downloaded files on the Desktop of your PC.
2. Extract files from the Fastboot package to your Desktop.
3. Turn OFF your smartphone using the Power key.
4. Reboot your phone into the fastboot mode by pressing and holding Volume DOWN+Power keys together.
5. Connect your phone to your PC when it is in fastboot mode.
6. Open a Command Prompt Window on your Desktop and type in the following commands:
fastboot flash recovery recovery-clockwork-touch-5.8.0.2-bravo.img
7. It will start installing the recovery on your phone. Wait for some time to finish it.
Well done ! You have successfully installed the Touch Based ClockworkMod Recovery on your HTC Desire smartphone....
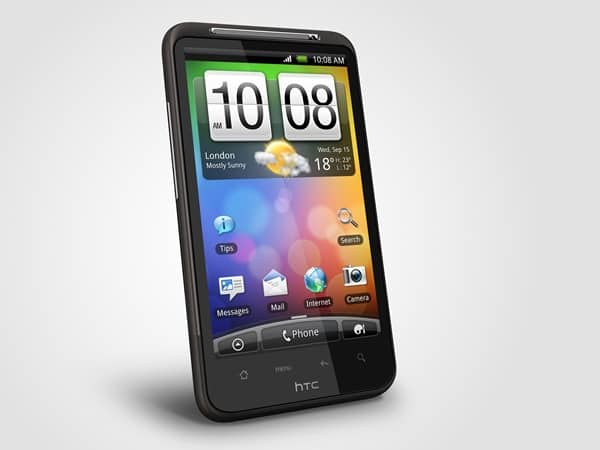
How To: Root/Flash Custom Recovery CWM/S-Off the HTC Desire (Unrevoked Method)


Video Source:The Unlockr

I. Before You Begin

1. This is the easiest method available to root.
2. This method will also flash a custom recovery image so you can start flashing ROMs immediately.
3. On your computer, go to Start > Control Panel > Programs > and Uninstall HTC Sync if it is installed before you continue.
4. UPDATE (1.18.11) - You must have active service on the phone, an SD card in the phone, and use the latest Unrevoked for your specific device from the download page.

II. Root and Flash a Custom Recovery Image

1. Download the Unrevoked Rooting App
*If the above version of Unrevoked doesn’t work, try this one, Unrevoked 3.31.
2. Double click the Unrevoked program you downloaded. If using Windows, then click on the file that appears called Hboot Driver and follow it’s instructions to install the modified HBoot drivers OR click here and download the drivers and install them manually.
3. Once the drivers are successfully installed, double click the Reflash program to open it.
4. Once the driver is successfully installed, turn off the phone by taking out the battery and putting it back in. Then push power to turn it on and get it to the normal home screen.
5. On your computer, right click the Reflash file and run as administrator. It should open Unrevoked and say “waiting for device”.
6. On your phone, click Menu > Settings > Applications > Development > and make sure USB Debugging is checked ON.
7. Plug in your phone into your computer via usb cable.
8. It should automatically locate your phone that is plugged in and you can just follow the prompts to continue.
9. Done! You are rooted and have a custom recovery image!

III. (UPDATE 12.09.10)(Optional) Gain S-OFF

1. Download Unrevoked Forever after rooting the phone using Unrevoked above.
2. Plug in your phone via USB cable and mount the sd card so you can transfer files to it.
3. Copy the unrevoked .zip file to the root of your sd card (not in any folders just on the sd card itself).
4. Turn off the phone and boot into recovery mode by holding down Volume Down and Power then selecting Recovery.
5. Click Flash .zip from SD card and choose the Unrevoked Forever .zip file and wait for it to flash. All done, you have S-OFF.

How to Install TWRP Recovery on the HTC Desire HD


TWRP Recovery for the HTC Desire HD
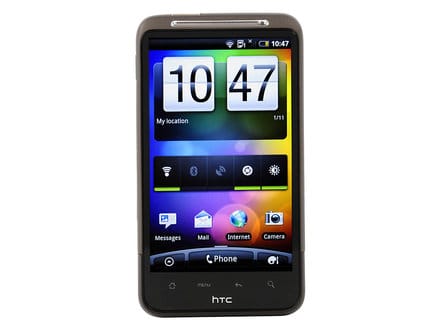
HTC Desire HD’s already rocking the ClockworkMod Recovery and now here comes another custom recovery, called TWRP Recovery. TWRP has become a familiar name to those who often flash recoveries, ROMs and are usually found with rooted devices. No matter whether you’re one of those guys or not, you can still flash the recovery on your device and that too without facing any issues. We’ve prepared a nice guide for you down below to let you experience this fully-touch enabled recovery on your device. And here you go:

I. Before You Begin:

1. You must have rooted your device before doing this procedure. Please head to our How to Root the HTC Desire HD procedure first, finish it, then return to this procedure and continue.
2. This will replace your current recovery with the TWRP Recovery.
3. Your device must be S-OFF.

II. Downloading Required Files:

1. GooManager — QR Code (Google Play Link)

III. Installing TWRP Recovery on the HTC Desire HD:

1. Start off with downloading the GooManager app on your device using the link given above.
2. Launch the GooManager app on your device from the App Drawer.
3. Hit Menu key on your device and select the Install OpenRecoveryScript option.
4. Tap Yes to confirm your action.
5. You’ll now see the model number of your device on your screen, if it’s perfect, hit Yes.
6. The recovery will now automatically be downloaded and installed on your device.
7. Once it’s installed, reboot your device
8. And you’re all done!
Excellent! TWRP Recovery has been successfully installed on your HTC Desire HD. A fully-touch and working recovery’s now waiting for your actions!

How to Install ClockworkMod Recovery Touch on the HTC Desire HD

CWM Recovery HTC Desire HD
The touch version of the ClockworkMod Recovery is available for the HTC Desire HD smartphone and once you have got it installed on your device, you will have a big list of custom ROMs to be installed on your smartphone. We have compiled all the required steps in the following guide on how you can install ClockworkMod Recovery on your HTC Desire HD smartphone.

I. Before You Begin:

1. You must have rooted your smartphone before doing this procedure. Please head to our How to Root the HTC Desire HD procedure first, finish it, then return to this procedure and continue.
2. Make sure your smartphone has at least 60% of battery life left.
3. The following procedure works on Windows PC only.

II. Downloading Required Files:

III. Installing ClockworkMod Recovery on the HTC Desire HD:

1. Download and place the package file onto your Desktop.
2. Extract files from the package to your Desktop.
3. Connect your smartphone to the PC using the USB cable.
4. Double-click the Start Here.bat file to open the Command Prompt Window.
5. Enter the following command into the Command Prompt Window:
adb reboot bootloader
6. Your smartphone should reboot into the Fastboot mode.
7. Now, enter the following command into the same Command Prompt Window:
fastboot flash recovery recovery-clockwork-touch-5.8.0.0-ace.img
8. After the recovery has been installed on your smartphone, issue the following command:
fastboot reboot
9. Your smartphone should reboot.
Congrats ! You have successfully installed the Touch ClockworkMod Recovery on your HTC Desire HD. The gates are open to the world of custom ROMs, it’s up to you what you want to do with your smartphone !

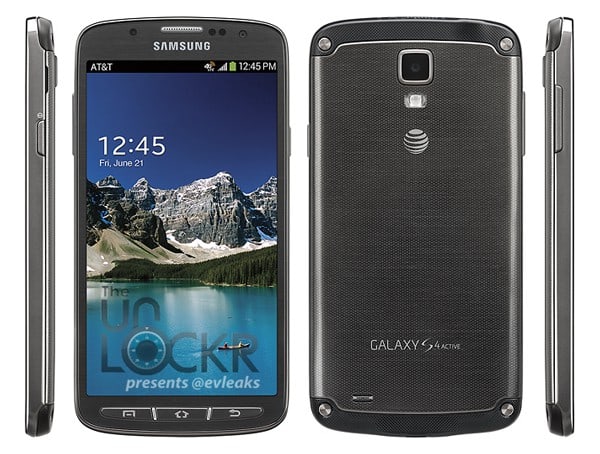
Samsung Galaxy S 4 Active Revealed for AT&T


Galaxy_S_4_Active
Picture Source:The Unlockr
It’s no secret that Samsung’s got a full complement of Galaxy 4-derived handsets trickling out over the next few months; the company just revealed the S 4 Mini, and next up we’re expecting a more rugged, full-sized device known as the Galaxy 4 Active (codename: J Active). Active, a (self-)reported five-inch, full HD handset powered by a quad-core, 1.9GHz Snapdragon 600 chipset from Qualcomm, will attempt to muscle in on some of the territory being staked out by Sony and its Xperia Z.
On AT&T, the eight-megapixel Active will be sold under model number SGH-I537, — in dark grey as well as teal, apparently — alongside a host of other upcoming Samsung handsets tipped for the second largest US carrier: SM-G730A “Golden” (Galaxy III mini), SGH-I527 “Melius” (Galaxy Mega 6.3), SGH-I257 “Serrano” (Galaxy S 4 mini), and SGH-I217 “Zest.” With the GalaxyNote 3 also seemingly a lock for AT&T in the fall, Samsung fans seem to have a pretty clear destination in terms of American operators this year.

Galaxy_S_4_Active

How to Unroot the HTC ChaCha


Unroot the HTC ChaCha
While rooting your device gives you many advantages, like enabling the installation of root-only apps and custom ROMs, unrooting helps you restore the warranty of your device. In the case when your device doesn’t work as it’s supposed to, you may unroot it and take it to the service center for any repairing. To unroot your HTC ChaCha smartphone, you may follow the following guide.

I. Before You Begin:

1. You must have rooted your device using the method given here. If you used any other method to root the device, we don’t guarantee that the following procedure will work for you.
2. The following procedure works on Windows based PCs only. Sorry Mac and Linux!

II. Downloading Required Files:

III. Unrooting the HTC ChaCha:

1. Place the Unroot Package archive on your Desktop.
2. Unzip files from the archive to your Desktop. There’ll be some batch files on your Desktop.
3. Enable the USB debugging option on your device from Menu>>Settings>>Applications>>Development>>USB debugging.
4. The Unknown sources option should also be enabled. Just head to Menu>>Settings>>Applications>>Unknown sources and tick-mark the box.
5. Connect your device to your PC using the USB cable.
6. From the files you extracted to your Desktop, double-click on RUNME-UNROOT.bat file.
7. Follow the instructions you see on the screen.
8. When it’s done unrooting the device, reboot the device.
9. You should be unrooted now!
Awesome! The root access’s gone from your device, making it impossible for you to touch the system files!

How to Install ClockworkMod Recovery on the HTC ChaCha


CWM Recovery for the HTC ChaCha
If the root access on your HTC ChaCha can’t satisfy you, as it just allows installation of root-only apps, you should move your head over to a custom recovery. A custom recovery will let you install custom ROMs which offer far more customization options that you wouldn’t usually get by installing apps. If this seems interesting to you, follow our guide below and get the ClockworkMod Recovery running on your HTC ChaCha.

I. Before You Begin:

1. You must have rooted your device before doing this procedure. Just head here and follow the instructions to root the device.
2. This should replace the stock recovery on your device with a custom recovery.
3. Make sure your device’s charged to last till the end of the process.

II. Downloading Required Files:

III. Installing ClockworkMod Recovery on the HTC ChaCha:

1. Download and place both the files you downloaded to your Desktop.
2. Extract files from the Fastboot archive to your Desktop. Do NOT launch any files just yet.
3. Enable the USB debugging option on your device from Menu>>Settings>>Applications>>Development>>USB debugging.
4. Connect the device to your PC via USB cable.
5. Open a Command Prompt Window on your Desktop. It can be done by pressing and holding the Shift button on your keyboard and right-clicking on any empty area on the screen, then select Open command window here.
6. Type in following commands into the Command Prompt Window:
adb reboot bootloader
7. The device should reboot into the bootloader mode, usually known as HBOOT mode.
8. Once you enter the bootloader mode, choose Fastboot option.
9. Next, enter following commands into the Command Prompt Window:
fastboot flash recovery recovery.img
10. Let it flash the recovery file.
11. Once it’s done, issue the following command:
fastboot reboot
12. The device should reboot and you’re all done!
Brilliant! Your device’s now equipped with a custom recovery called ClockworkMod, it’s waiting to be tested out by you!

How to Root the HTC ChaCha


Root the HTC ChaCha
Announced at the Mobile World Congress 2011, the HTC ChaCha is a smartphone by HTC that runs on the Android OS providing users access to thousands of apps available over at Play Store. With main focus being on the comfort of the typing, this device can actually help you send hundreds of texts a day to your friends with its physical keyboard. If you’re one of the owners of this device and looking for a way to root, to get access to a lot more apps, then following guide’s certainly going to help you. It shows how you can root your HTC ChaCha smartphone with the easiest method available.

I. Before You Begin:

1. If you root your device, the warranty will be voided. However, you can restore the warranty by unrooting the device.
2. You must have unlocked bootloader of your device. You can do so from here.
3. The following procedure works on Windows based PCs only.

II. Downloading Required Files:

III. Rooting the HTC ChaCha:

1. Download and place the Root Package archive on your Desktop. Don’t put it inside any folder, just leave it on top.
2. Extract files from the archive to your Desktop using WinRAR or other similar tools.
3. Enable the USB debugging option on your device by going to Menu>>Settings>>Applications>>Development>>USB debugging, tick-mark the box.
4. Turn ON the Unknown sources option from Menu>>Settings>>Applications>>Unknown sources.
5. Once you’ve enabled both the options, connect the device to your PC via USB cable.
6. You should have a file named RUNME.bat on your Desktop, double-click on it.
7. Follow the instructions given in the tool.
8. Once it’s done,  reboot your device.
9. You’re rooted now!
Amazing! Your HTC ChaCha now has access to root level files, letting you install root-only apps and modify system files, if you wish.

How to Root the HTC Butterfly (X920D)


HTC-butterfly-root
Now that you have TWRP on your HTC Butterfly, it’s time to go ahead and finally root the heck out of it.  And as we promised in our previous post on flashing TWRP Recovery, this is pretty easy and you should be done in minutes!  So read on then if you want to know how to root your HTC Butterfly.

I.  Before You Begin

1.  Back up everything you deem important.
2.  Charge your device to 75% or more before you begin.
3.  You need to have TWRP Recovery (or any other custom recovery) installed for this procedure to work.  If you don’t have it already, our post detailing the procedure to get this on to your device should help you.

II.  Necessary Downloads

III.  Rooting the HTC Butterfly

1.  Connect your device to your PC and copy the su_buzyb0x.zip file you download above to your device’s SD card.
2.  Boot your device into TWRP Recovery.  To do this, with the device off, press the Volume Down and Power buttons simultaneously until you are presented with the fastboot menu, then use the Volume Up/Down buttons to navigate to Recovery and then use the Power button to select it.
3.  Once in TWRP Recovery, tap on Install, navigate to the location of su_buzyb0x.zip and select it.
4.  Swipe the confirmation arrow to the right to begin flashing the file.
5.  Tap on Reboot system once the flashing is done.
And when your device boots up, you should find that Superuser app tucked away in your app drawer confirming that you now have root privileges on your HTC Butterfly!